Welcome to The Pavelka App Help Hub
Lorem ipsum dolor sit amet, consectetur eiusmod tempor incididunt ut labore et dolore magna.
Your one-stop space for guidance, troubleshooting, and tips to get the most out of the Pavelka App.
Whether you're setting up a challenge, joining one, or resolving a login issue — you'll find helpful, step-by-step support right here.
Everything is organised into clear sections, or you can use the search bar to quickly find exactly what you need and get back to focusing on your wellbeing.
Accessing and Using the App
Support for logging in, resolving access issues and editing your profile.
Open the Web App
To access the Pavelka Web App, simply open it in your browser — we recommend using Google Chrome for the best experience.
Download the Mobile App
The mobile app is available on both Google Play and the Apple App Store.
Just search “Pavelka” in your device’s store, or scan the QR codes below to get started:




💡 Quick tip: The first time you open the app, you’ll be guided through a short registration to set up your preferences and personalise your experience.
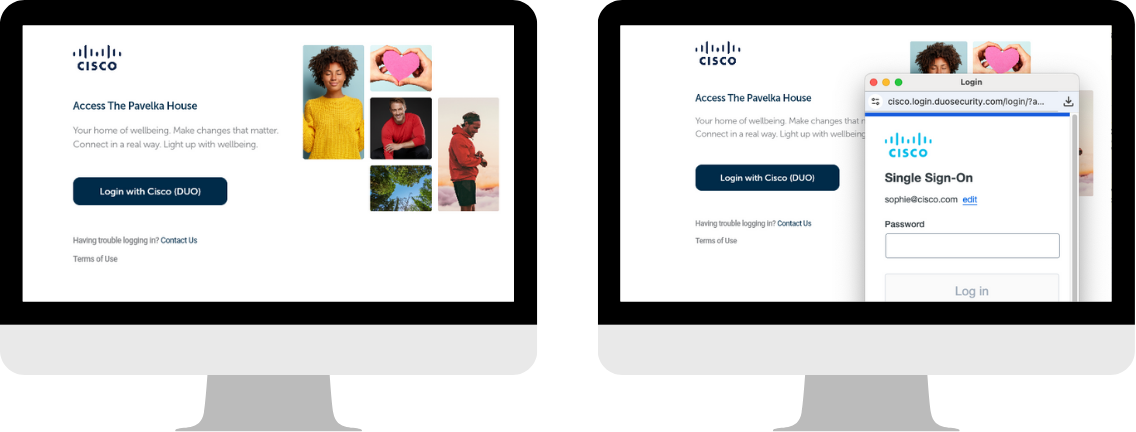
💻 Log into the Web App
- Select "Login with Cisco (DUO)" to accept the Terms of Use
- Authenticate with your Cisco credentials
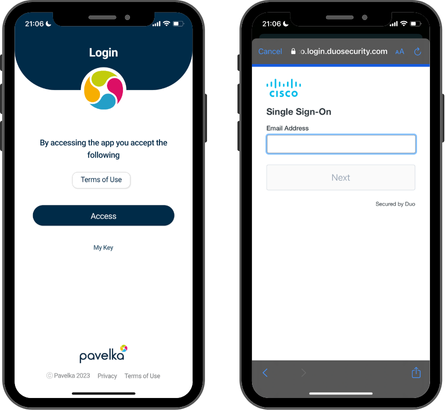
📲 Log into the Mobile App
- Select "Access" to accept the Terms of Use (Ensure you have checked the Login Checklist)
- Authenticate with your Cisco credentials
Before logging in, make sure to check the login checklist below.
✅ For a smooth login to the Mobile App, please check the following login checklist:
- App version: Make sure you have the latest version of The Pavelka App installed on your mobile device from Google Play Store or Apple App Store.
- MDM device registration and Work profile installation: Cisco requires your phone to be registered with their Mobile Device Management (MDM) system. Once registered for MDM, The Pavelka App must be installed in your Work Profile, not your personal profile.
- Device settings: Jailbroken devices or those with Developer Mode active are not supported and will prevent login.
💡 Quick tip: If something's gone wrong, try fully closing the app and reopening it — this often clears up unexpected issues.
📩 Got stuck?
If you've restarted the app and tried the login checklist but are still having trouble, we're here to help. Please email us at support@pavelka.global with the following details:
- A screenshot or screen recording showing the exact error message
- Your device make and model
We’ll get back to you as quickly as possible to help resolve the issue.
Challenges
Step-by-step guidance for creating, joining, and managing challenges in the app.
Want to run your own challenge? Here’s how to get started in the app, after you log in as normal:
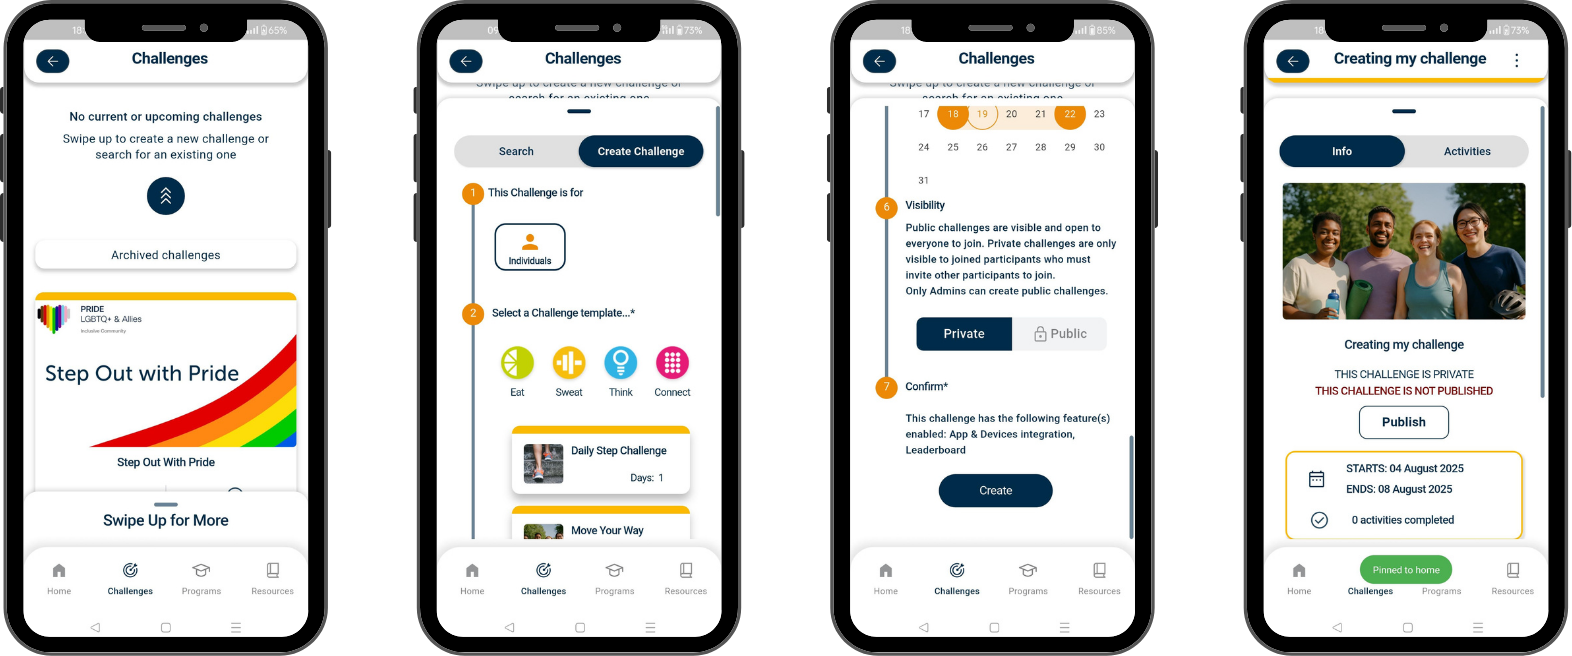
- Head to the Challenges section.
- Swipe Up for More from the bottom and select the Create Challenge tab. Follow the steps to customise your challenge:
- Pick the challenge template you want to use
- Add an image to make it recognizable
- Give it a title so participants know what it' s about (you can also add a short description, if you like)
- Set your start and end dates
- Tap Create to save your draft — this lets you review everything before going live.
- When you are ready to invite others, tap Publish in the Info section to make your challenge go live!
Note: All challenges created by users are private — only the people you invite will be able to see and join.
Want to run a public challenge that’s open for anyone to discover and join? Speak to your admin team to make it happen.
💡 Top tip: Want to make a change? As the challenge creator, you can edit the details any time!
Running your own challenge and what to make changes? After you Log into the app as normal, from the Challenges section:
- Find and open your challenge
- Tap the three dots in the top right corner and choose Edit Challenge
- Update your details and hit Save
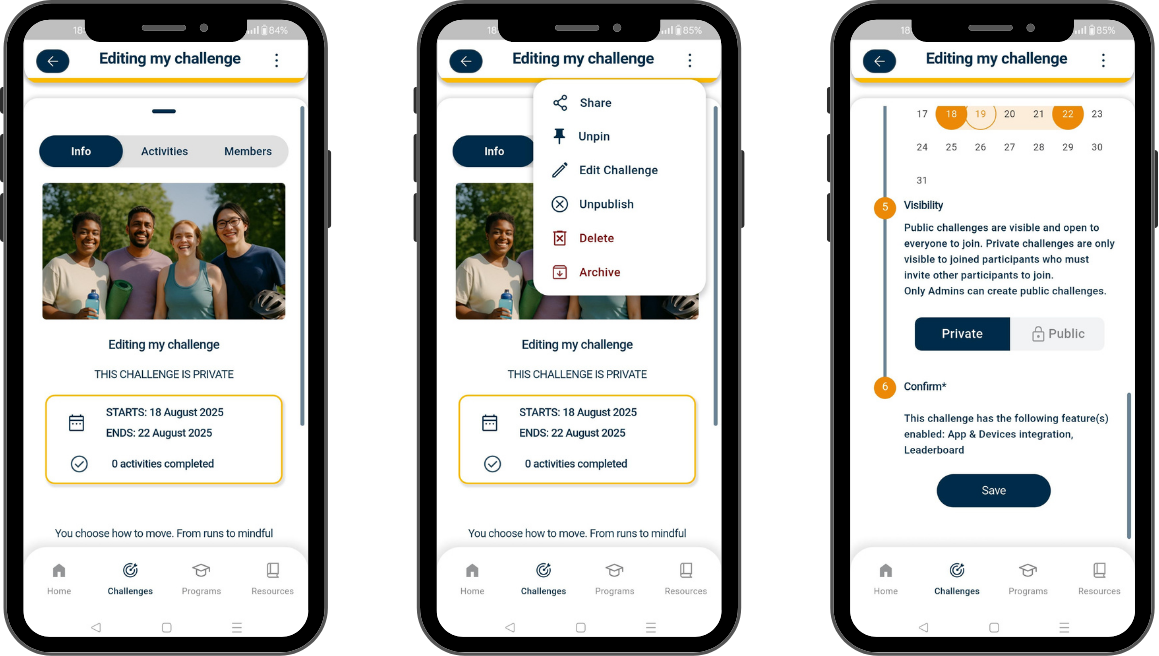
Note: Changes may take up to an hour to show for others
Got your challenge ready? Time to bring people in:
- Open your challenge in the app and Swipe Up for More from the bottom, if it doesn't auto swipe up for you.
- Select the Members tab.
- Search by name or email
- Tap the user and hit Invite
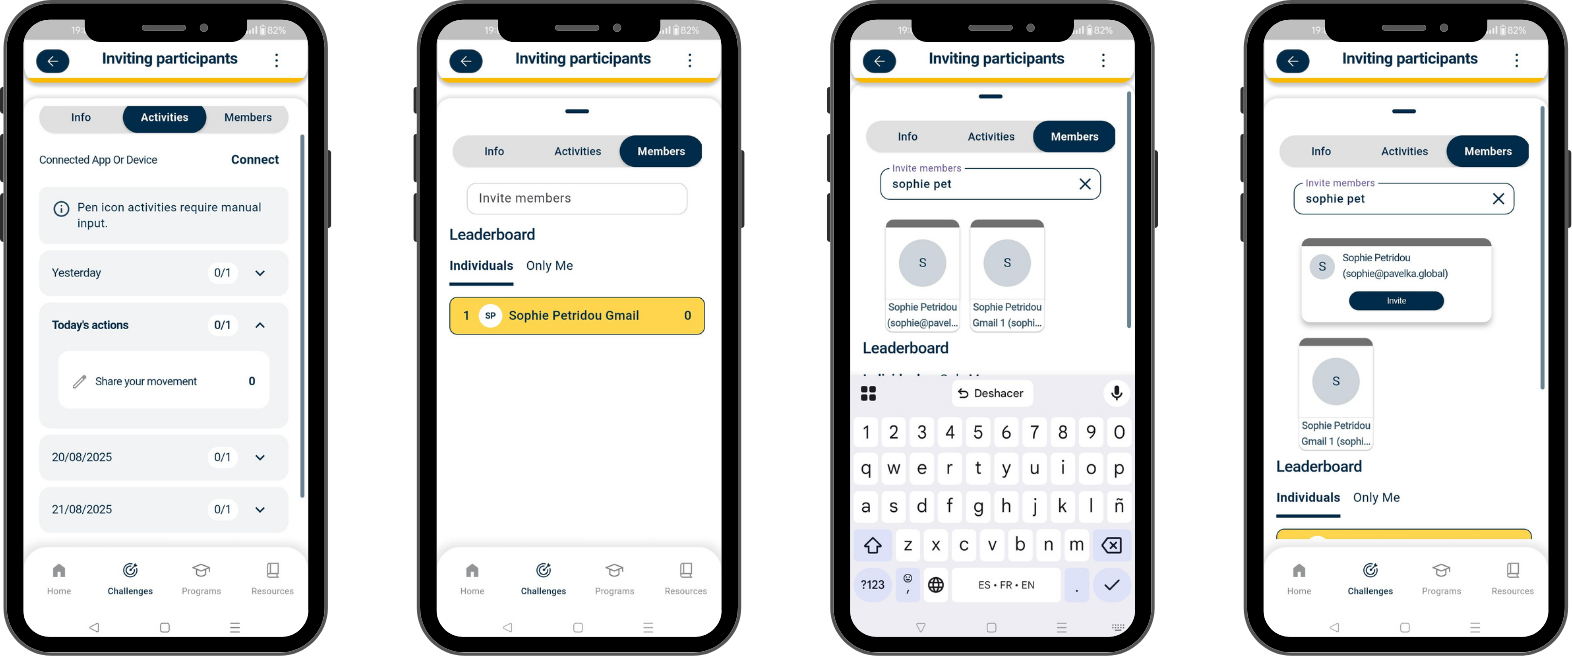
⚠️ Users need to have downloaded and logged into the app before you can invite them. Ideally, once logged into the app, give them at least an hour before sending the invite.
Joining a Public challenge is easy:
- Open the app, go to the Challenges section
- Swipe up for more from the bottom, and in the Search tab browse or search for the challenge you want to join
- Tap the challenge and select View
- Select Join Challenge
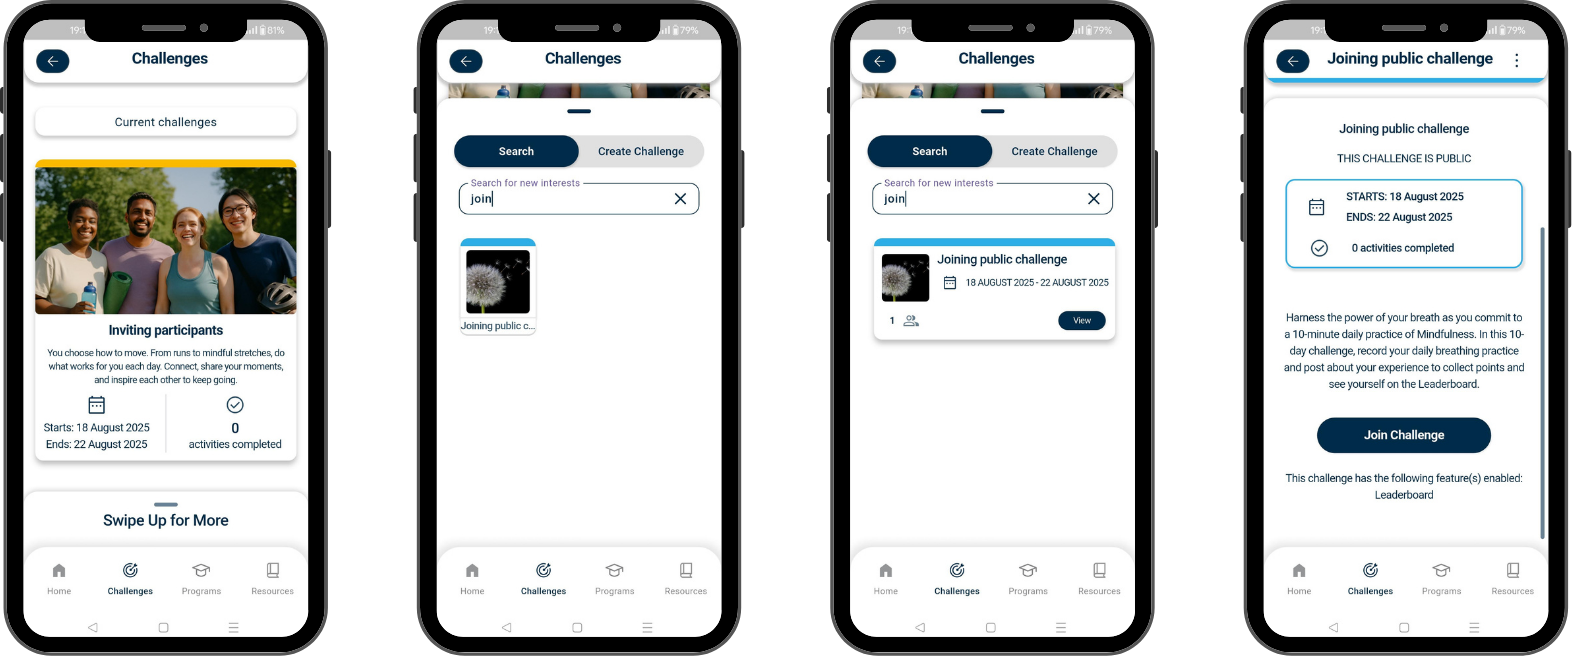
💡 If the button isn’t there, the challenge might not be open for joining anymore.
Note: If you are looking for a private challenge, you can join via invitation from existing participants only.
🔒 Joining a private challenge?
You’ll need to accept an invitation first. Once invited,
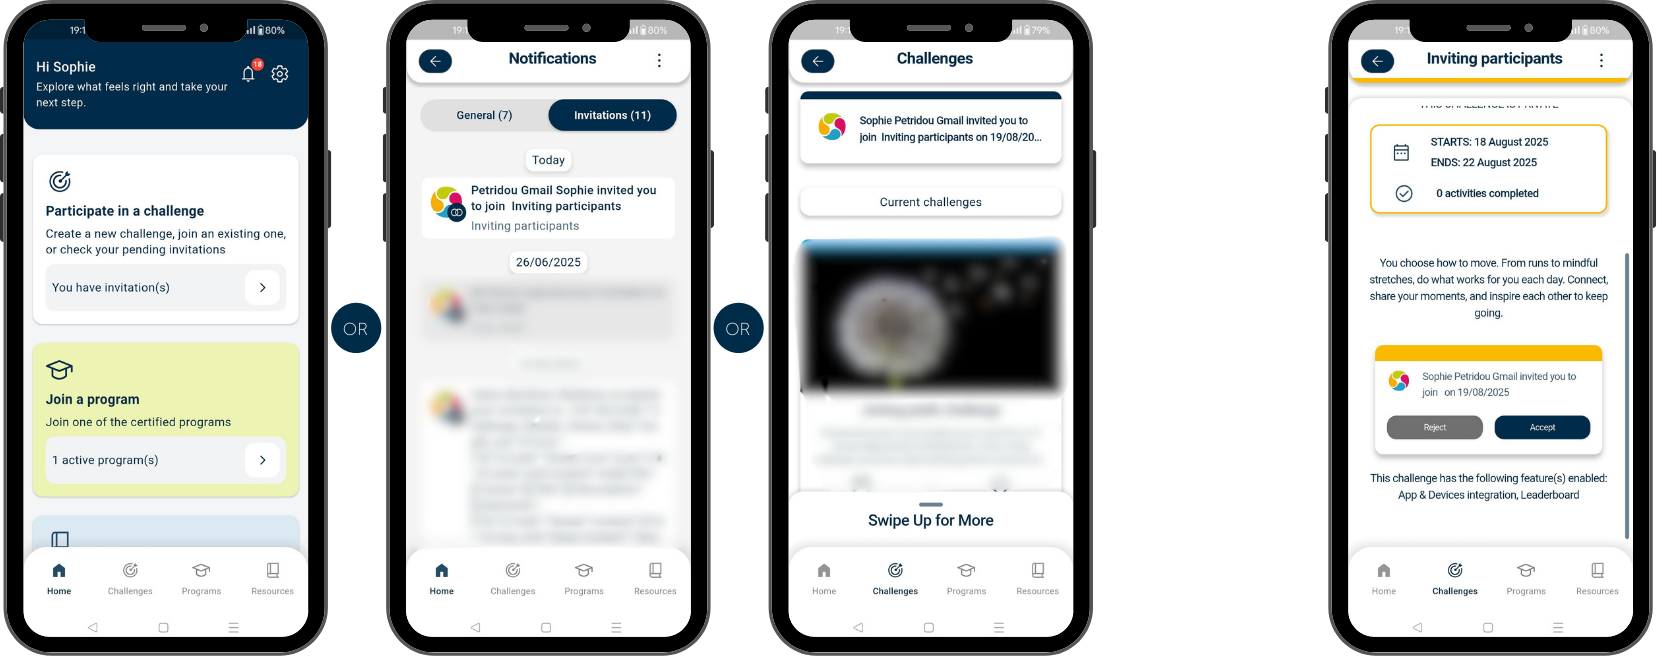
- You can access your pending invitation via your Homepage Challenge tile OR via your Invitations tile in Notifications OR the Challenges section
- Select the invitation and once in the Challenge just tap Accept to join.